4 simple tricks to taking a great ID card photo
Trying to take a professional photo at home can be daunting. But with a few clever tricks, you can transform your ID card photo from drab to fab!
Ready to take your ID card photo?
Keep reading for tips and tricks to create a mini-home or work ‘photo studio’ to get your best shot.
Firstly, let’s take a look at an ‘ideal’ ID card photo.

The background is simple and uncluttered, the lighting is good and there’s nothing covering the subject’s face.
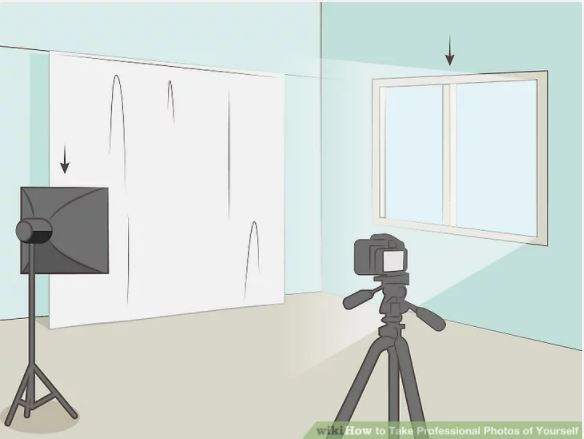
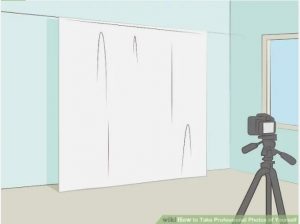
1. For your background, a white sheet on the wall can do the trick.
2. Take the photo in natural light in a well-lit space.
Make sure the subject’s face is not in direct sunlight, as this can cast shadows or cause squinting. And make sure the light is not behind the subject, this can cause a halo. Naturally diffused light from a window is best.
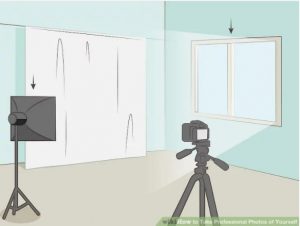
3. Take the photo about 1 foot from a wall

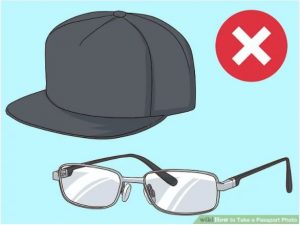
4. Make sure there’s nothing covering the face.
This includes hair, hats, or sunglasses. Prescription glasses can be worn, just be conscious to capture the eyes and not the glare on the glasses.
For more information, visit the original Wikihow.com article on taking professional ID photos.
Images all credited to Wikihow.com
If you have any questions, or for more information about eQuality Support’s onboarding process, contact the team.